Uninstall Instructions

Last Updated: July 18th, 2023

DriverAssist Uninstall Instructions

1. In the Microsoft search bar Type ‘add or remove programs’ and press Enter.


Search2.png


2. A list of installed programs will appear. Scroll down until you find DriverAssist.


Add Remove.png


3. Click on DriverAssist in the list.


4. Select the Uninstall button.


Uninstall.png


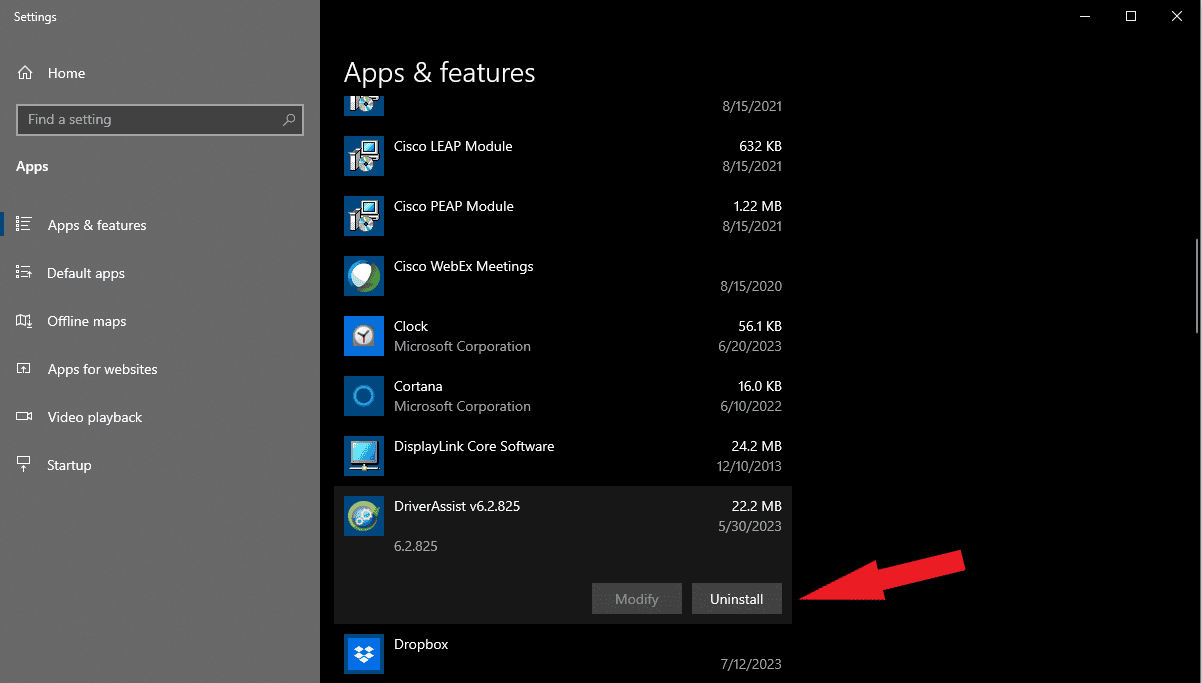
5. Follow any prompts or instructions that appear to complete the uninstallation process.


6. DriverAssist has now been successfully removed from your computer.


*Please note that the specific steps may vary slightly depending on the version of Windows you are using.
 

Trademarks: Microsoft and the Windows® logo are registered trademarks of Microsoft. The information on this page is provided for international purposes only.

© 2014-2025 SB Software Group, LLC. All Rights Reserved.

PC Operating System(s): (32/64 Bit) Windows 11 / Windows 10 / Windows 8 / Windows 7

DriverAssist saves you time by automatically managing and updating your drivers, ensuring your PC functions as intended.

Please note that the effectiveness of DriverAssist can be influenced by various factors beyond its control, such as existing security applications, installed hardware, and other system-specific circumstances. Access to the full functionality of DriverAssist requires an active subscription. This includes access to driver updates, upgrades, and unlimited support from our service representatives.

Any third-party logos or brands mentioned on this site are the property of their respective owners. We do not claim affiliation, sponsorship, or endorsement by these companies unless otherwise stated.